


The Nucleus One gives you the ability to install a 2.5” HDD (Hard Disk Drive) or SSD (Solid State Drive) with up to 15mm drive height, allowing you to add internal SATA storage of up to 8TB in just a few simple steps.

Unscrew the 4 screws of the cover and place them carefully to one side.

Slide the hard drive into the mounting bracket on the other side of the cover, ensuring the port aligns with the SATA cable.
The mounting bracket has two holding brackets on one end, shown in the image. This needs to be the side of your hard drive without the SATA connection. The port should sit in the open end of the mounting bracket.
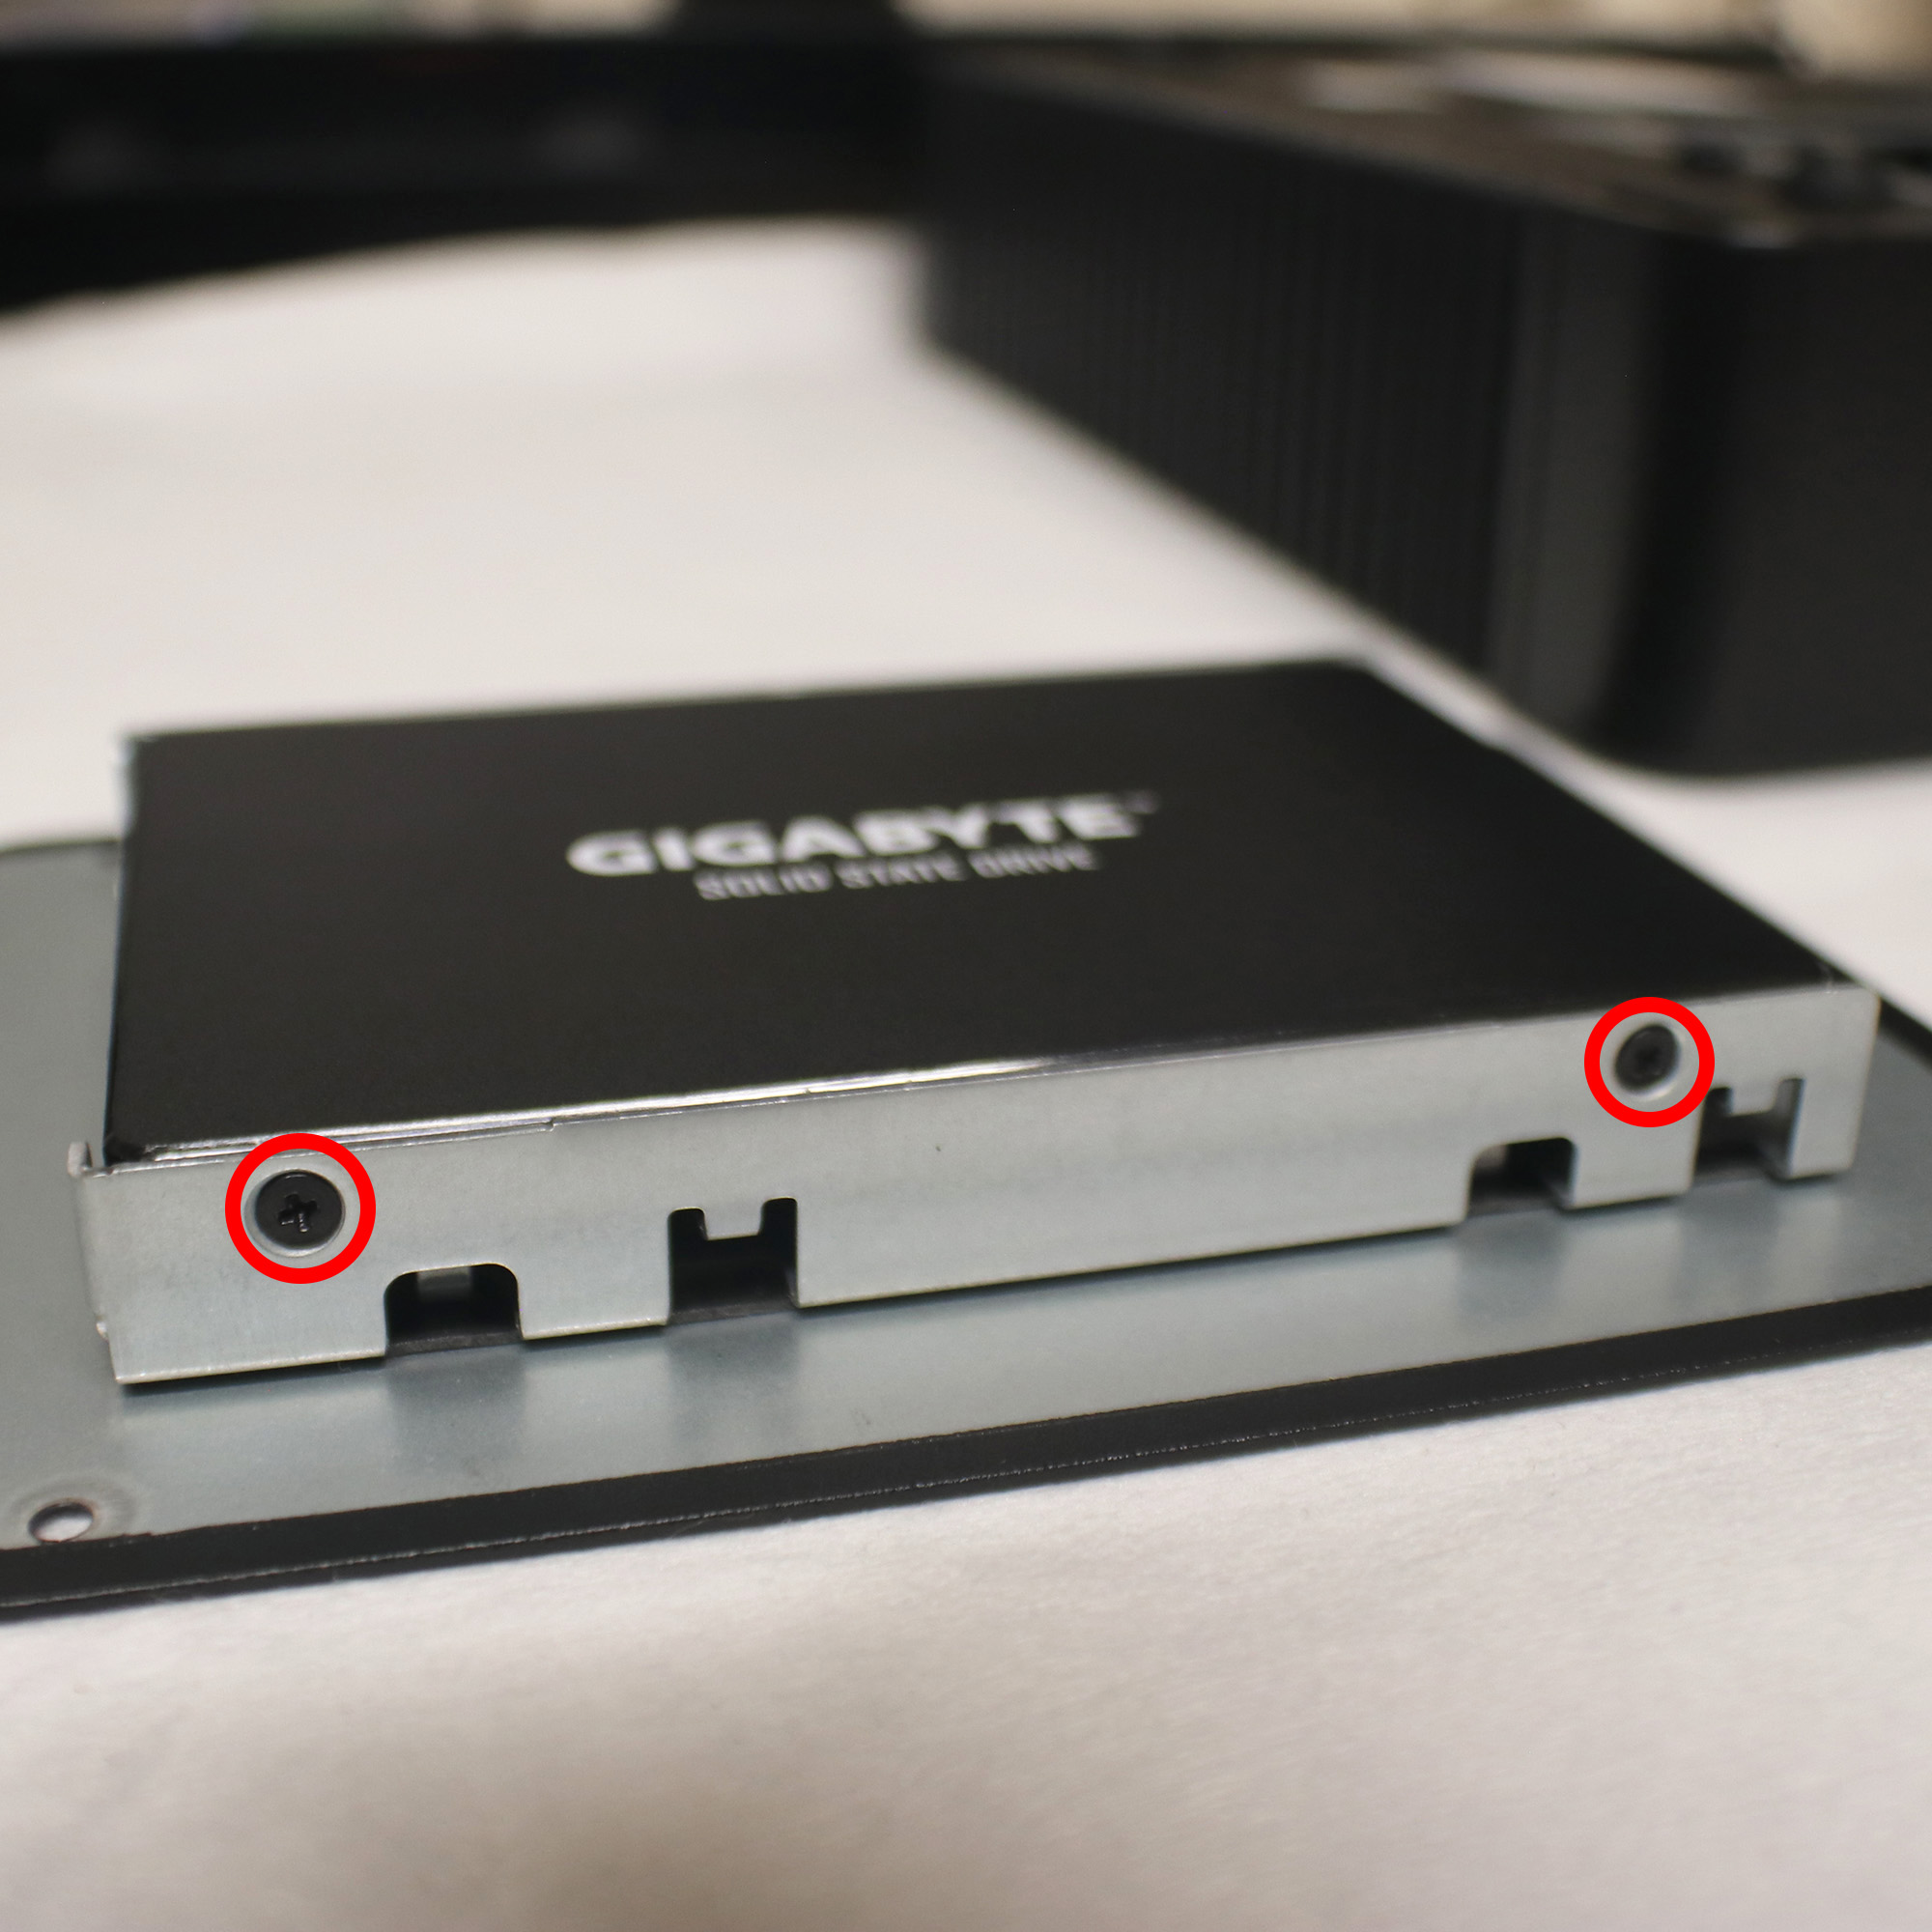
Use the 4 screws provided with your Nucleus One to secure your hard drive into the mounting bracket.
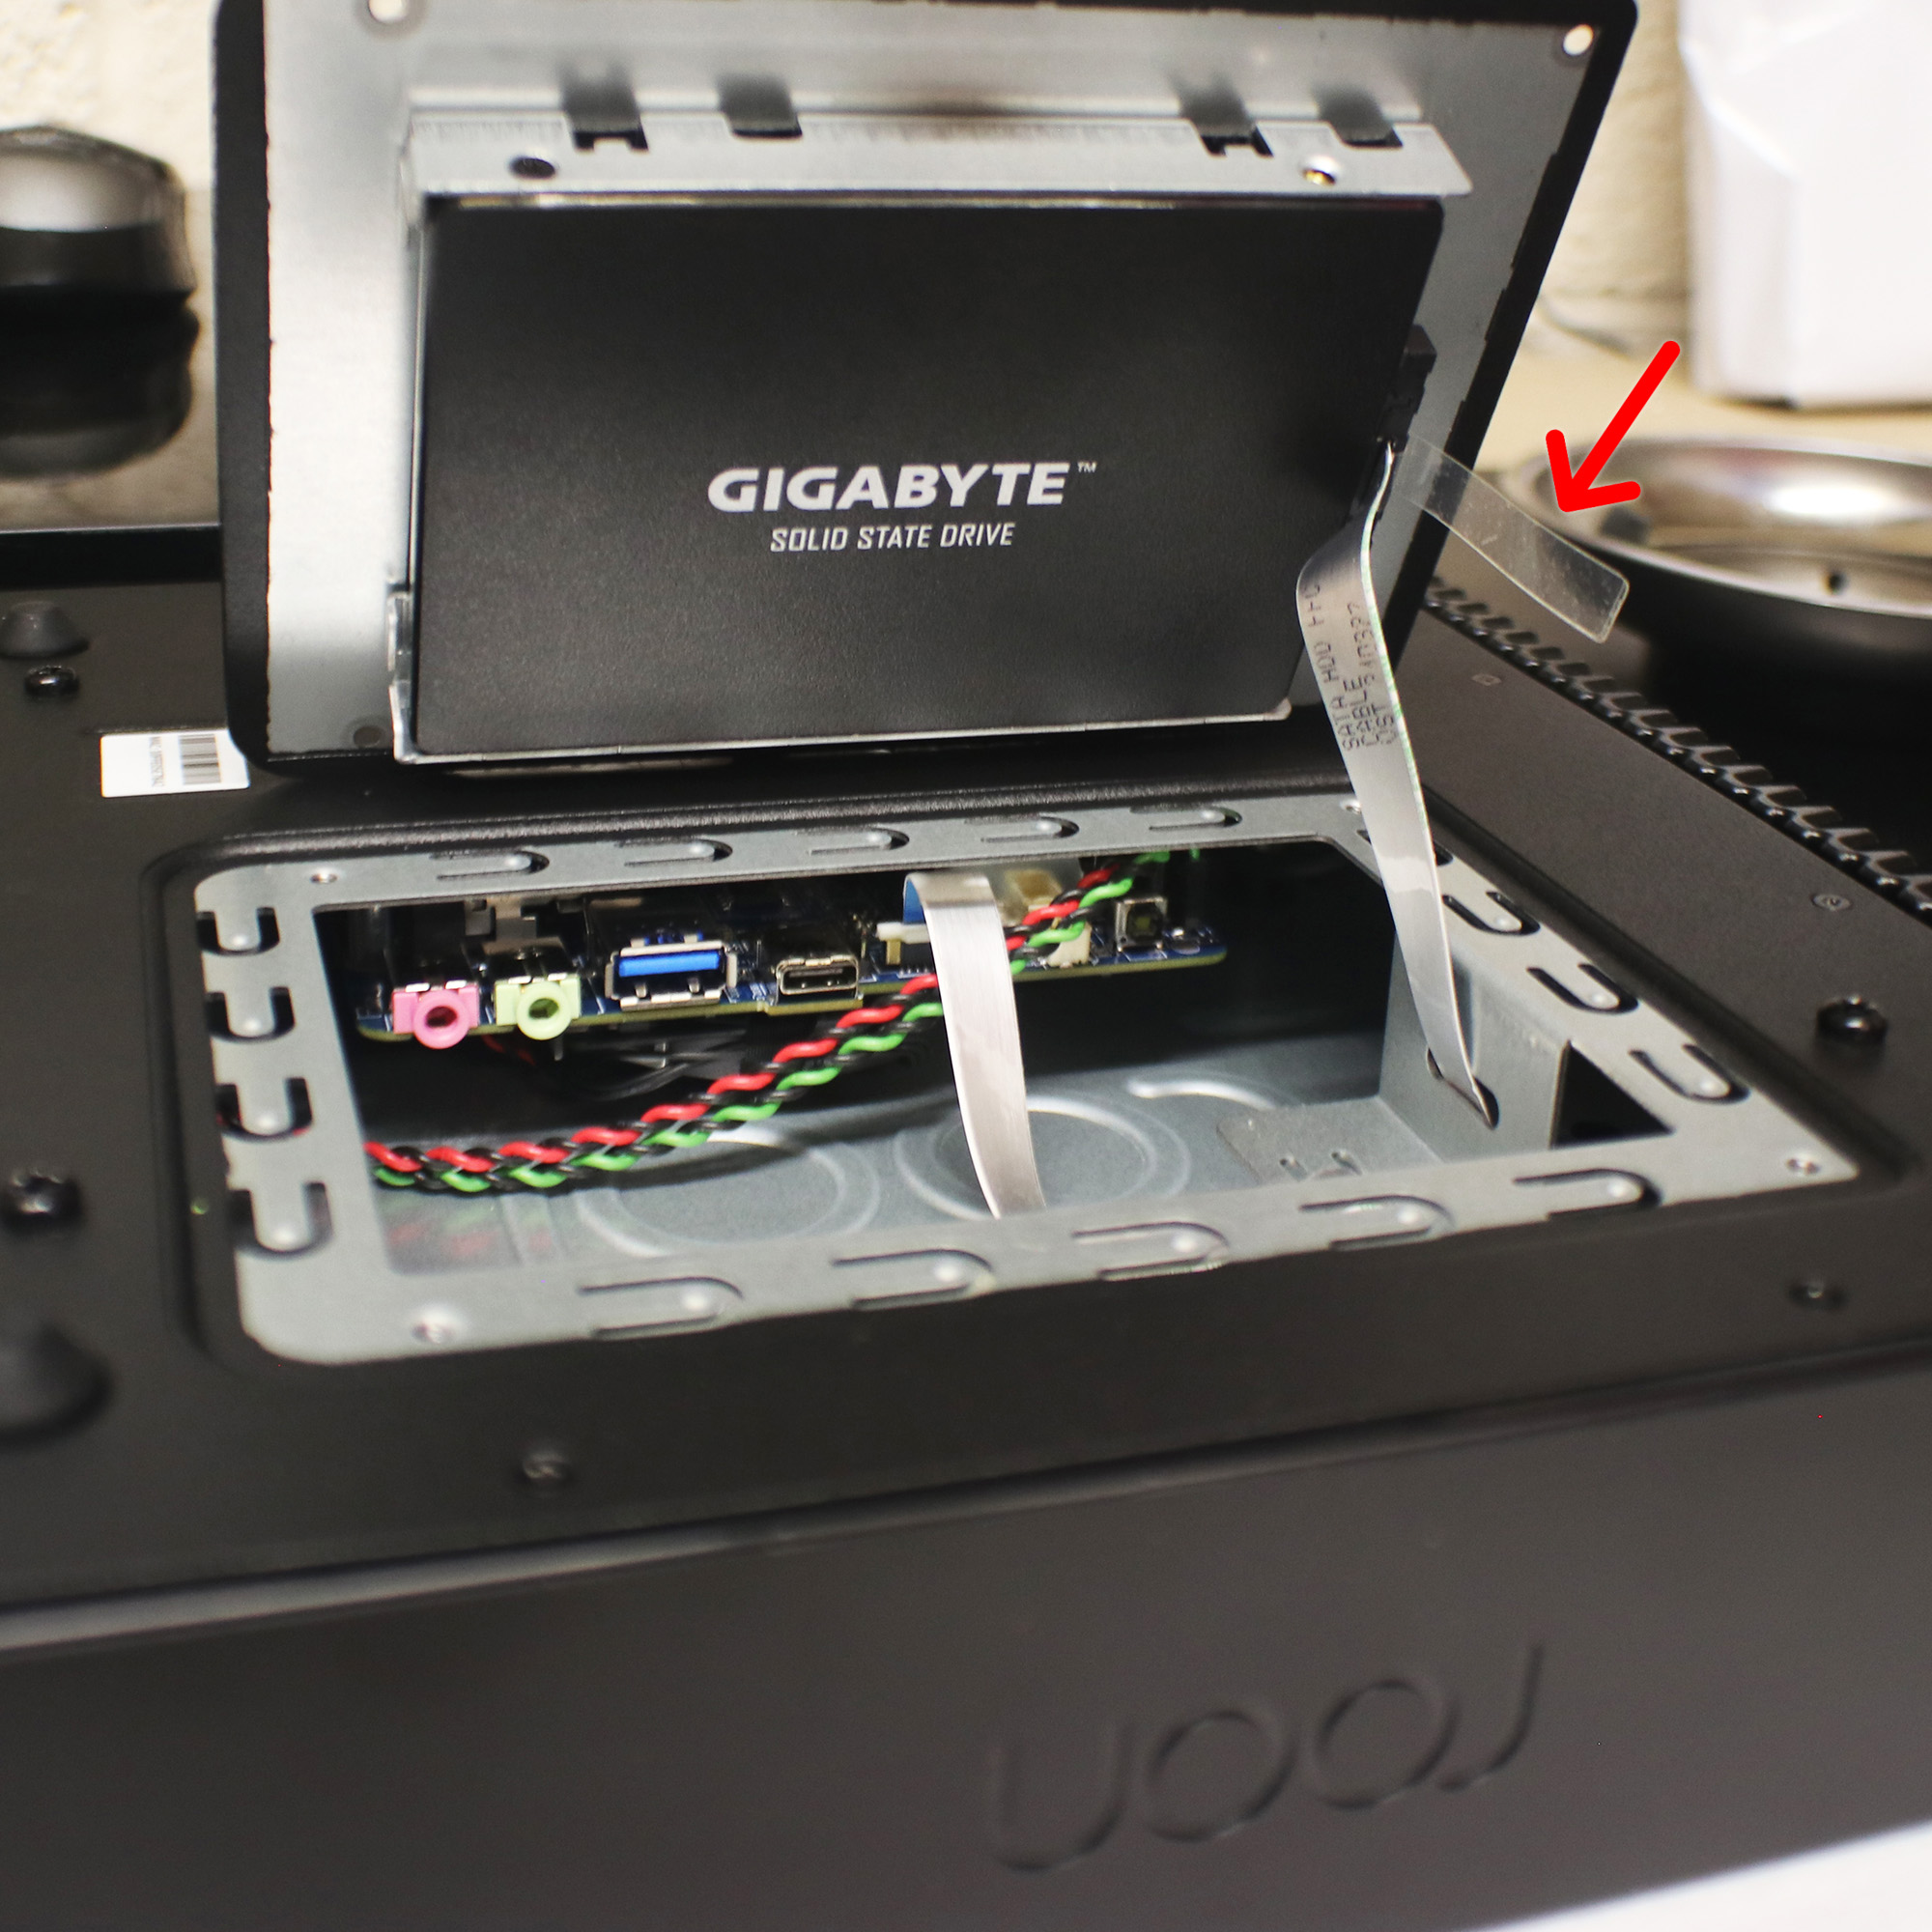
Carefully flip over the mounting bracket and plug in the cable to your hard drive port. Ensure you are being gentle, so you don’t damage the cable.
NOTE: If for any reason you need to disconnect the hard drive, use the transparent ribbon, shown in the image. Do not pull on the cable forcefully as this could potentially damage the SATA connector.
Once you have successfully plugged in your hard drive, slowly lower the cover into place and re-do the 4 screws shown in step 1.
Turn your Nucleus back on and visit the Nucleus Web Administration Interface to format this newly installed drive. Your drive will not be available in Roon until you format it using the Nucleus Web Administration Interface.

