


Setting up a turntable properly is a crucial process in getting the best possible sound quality from your vinyl records. Each turntable design is unique and may give you more or less ways to adjust its set-up, but understanding all aspects of proper turntable installation can help you to also make better purchasing choices and give you more years of perfect analogue playback when you're set-up at home.
If you would like to jump straight into our comprehensive guide to setting up turntables, click here, but if you'd like to understand more, first we're going to explain the core design principles behind most hi-fi turntables...
Before a record player can be designed, some important principles must be understood. The most important of these is that the stylus or diamond tip of the cartridge must exactly trace the undulations pressed into the groove walls of the record. For this to happen the pickup cartridge must be held absolutely rigid and stable, and the record must also be held absolutely rigid and stable. Then the only thing that is moving is the diamond tip, and as a result the output of the cartridge is a perfect electrical replica of the shape of the groove with nothing added and nothing taken away.
That is the theory. In practice the record is being rotated and so cannot be held rigid and the cartridge is mounted in a freely moving tone-arm, which also cannot be held totally rigid. Nonetheless the skill of the designer is to rotate the turntable at a constant speed whilst allowing it to have no lateral (side-to-side) motion and to design a totally rigid tone arm which allows the stylus to track across the record. The success of the designer in getting close to these ideals determines the ultimate performance and the quality of the musical experience.
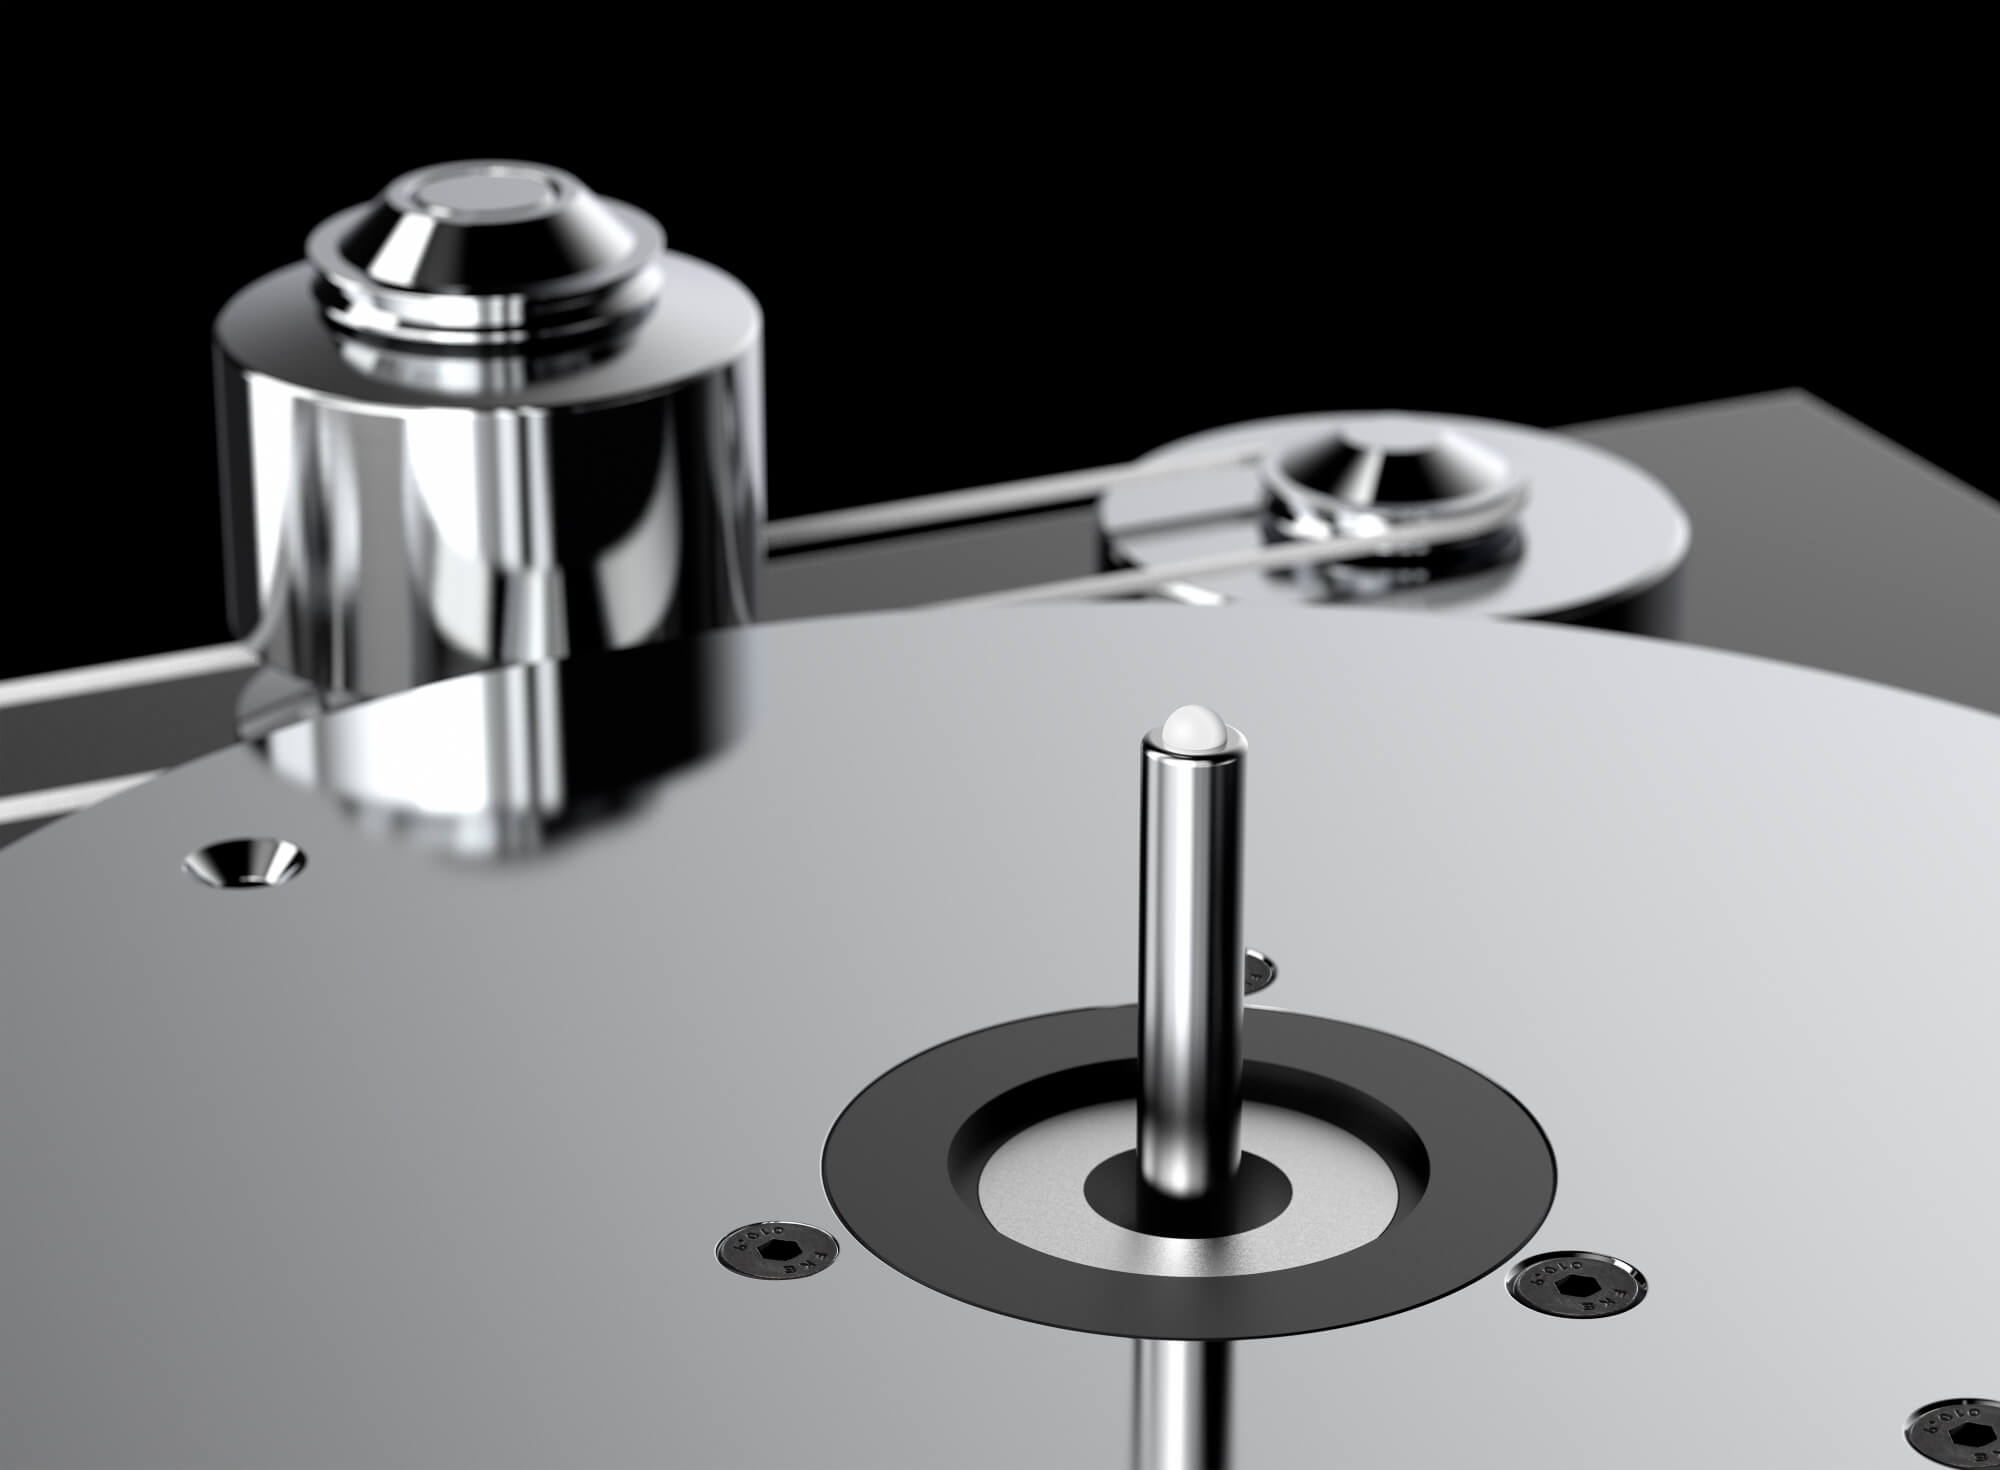
At first glance it would seem to be a simple task to rotate a turntable at the correct speed, but in practice there are a number of problems which can be difficult to overcome. The turntable platter is mounted onto a shaft which rotates upon a bearing assembly. First these bearings have to be extremely smooth in operation because any irregularities produce 'rumble', the effect of which is similar to that felt when driving a car along a gravel path. The small undulations cause the platter to move up and down an almost imperceptible amount but the movement is detected by the stylus and added to the signal as a distortion.
Secondly the bearing has to be very tight with virtually no slack, which would allow the shaft and platter to move from side to side. Again any sideways motion would be detected by the stylus as a 'wow'; the sort of effect that would be heard on a sustained piano note as a crude vibrato.
For much the same reason the turntable platter itself needs to be perfectly balanced and of uniform structure. Throughout the Pro-Ject range you will always find very solid, often heavy main platters of varying types suitable to the budget and application of the design.
Obviously the rotational speed needs to be held constant and this is normally achieved using an AC synchronous motor, which in the case of Pro-Ject's turntables is often regulated by a DC-powered AC generator built-in to the turntable for clean, consistent power.
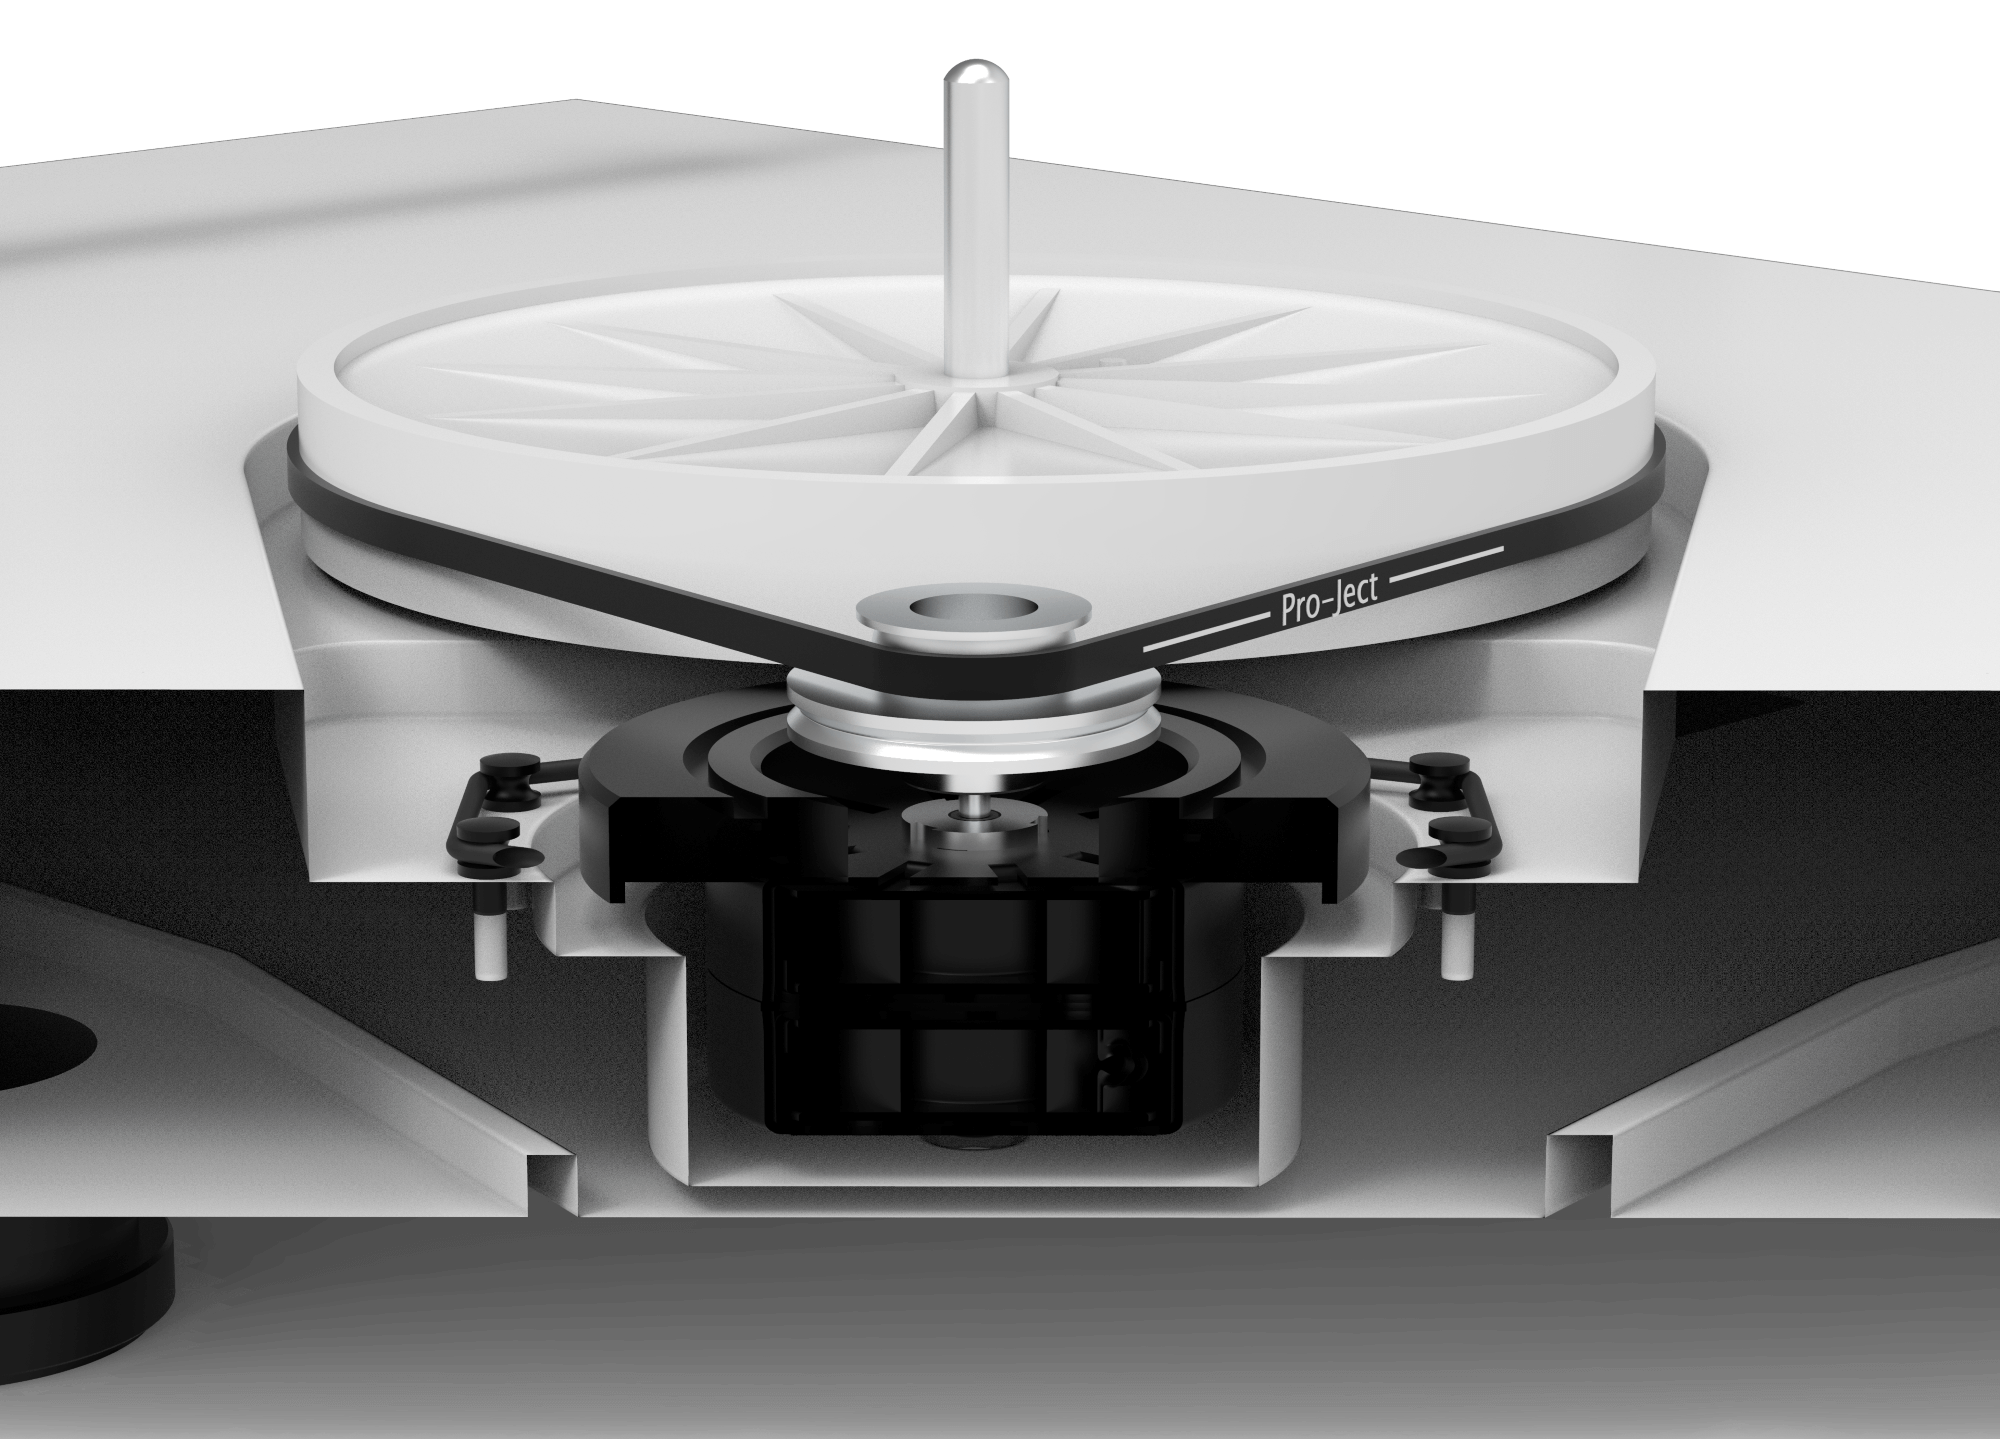
Of course even the best motors have imperfections, and these include the small vibrations created within the motor bearings; small vibrations caused by noise and interference on the mains power lines and the so-called 'clogging' vibrations; a consequence of the motors having a finite number of poles giving an 'on-off-on-off' type of motion.
Any of these vibrations reaching the stylus could degrade the sound, so it is good design practice to decouple the motor assembly from the turntable platter by a belt drive using a carefully specified belt. The characteristics of this belt (compliance, surface finish, etc.) and the amount of tension determine the degree of isolation between the motor and platter, but a high-mass platter will always smooth out any tiny remaining speed irregularities as a result of the 'flywheel effect' which causes the rotational speed to settle to a constant value.
Almost every object resonates. Tap any object and the “knocking” sound will be at a different note from object to object, because each has its dominant resonances. When an object resonates it actually vibrates to a larger than usual degree and, of course, in a record player any vibrations have the risk of being picked up by the stylus and added to the music signal.
For this reason Pro-Ject use a variety of technologies throughout their range to ensure the plinth (the main structure of the turntable), the platter and other key components are extremely well damped or isolated in order to avoid unwanted resonances transferring to the cartridge.
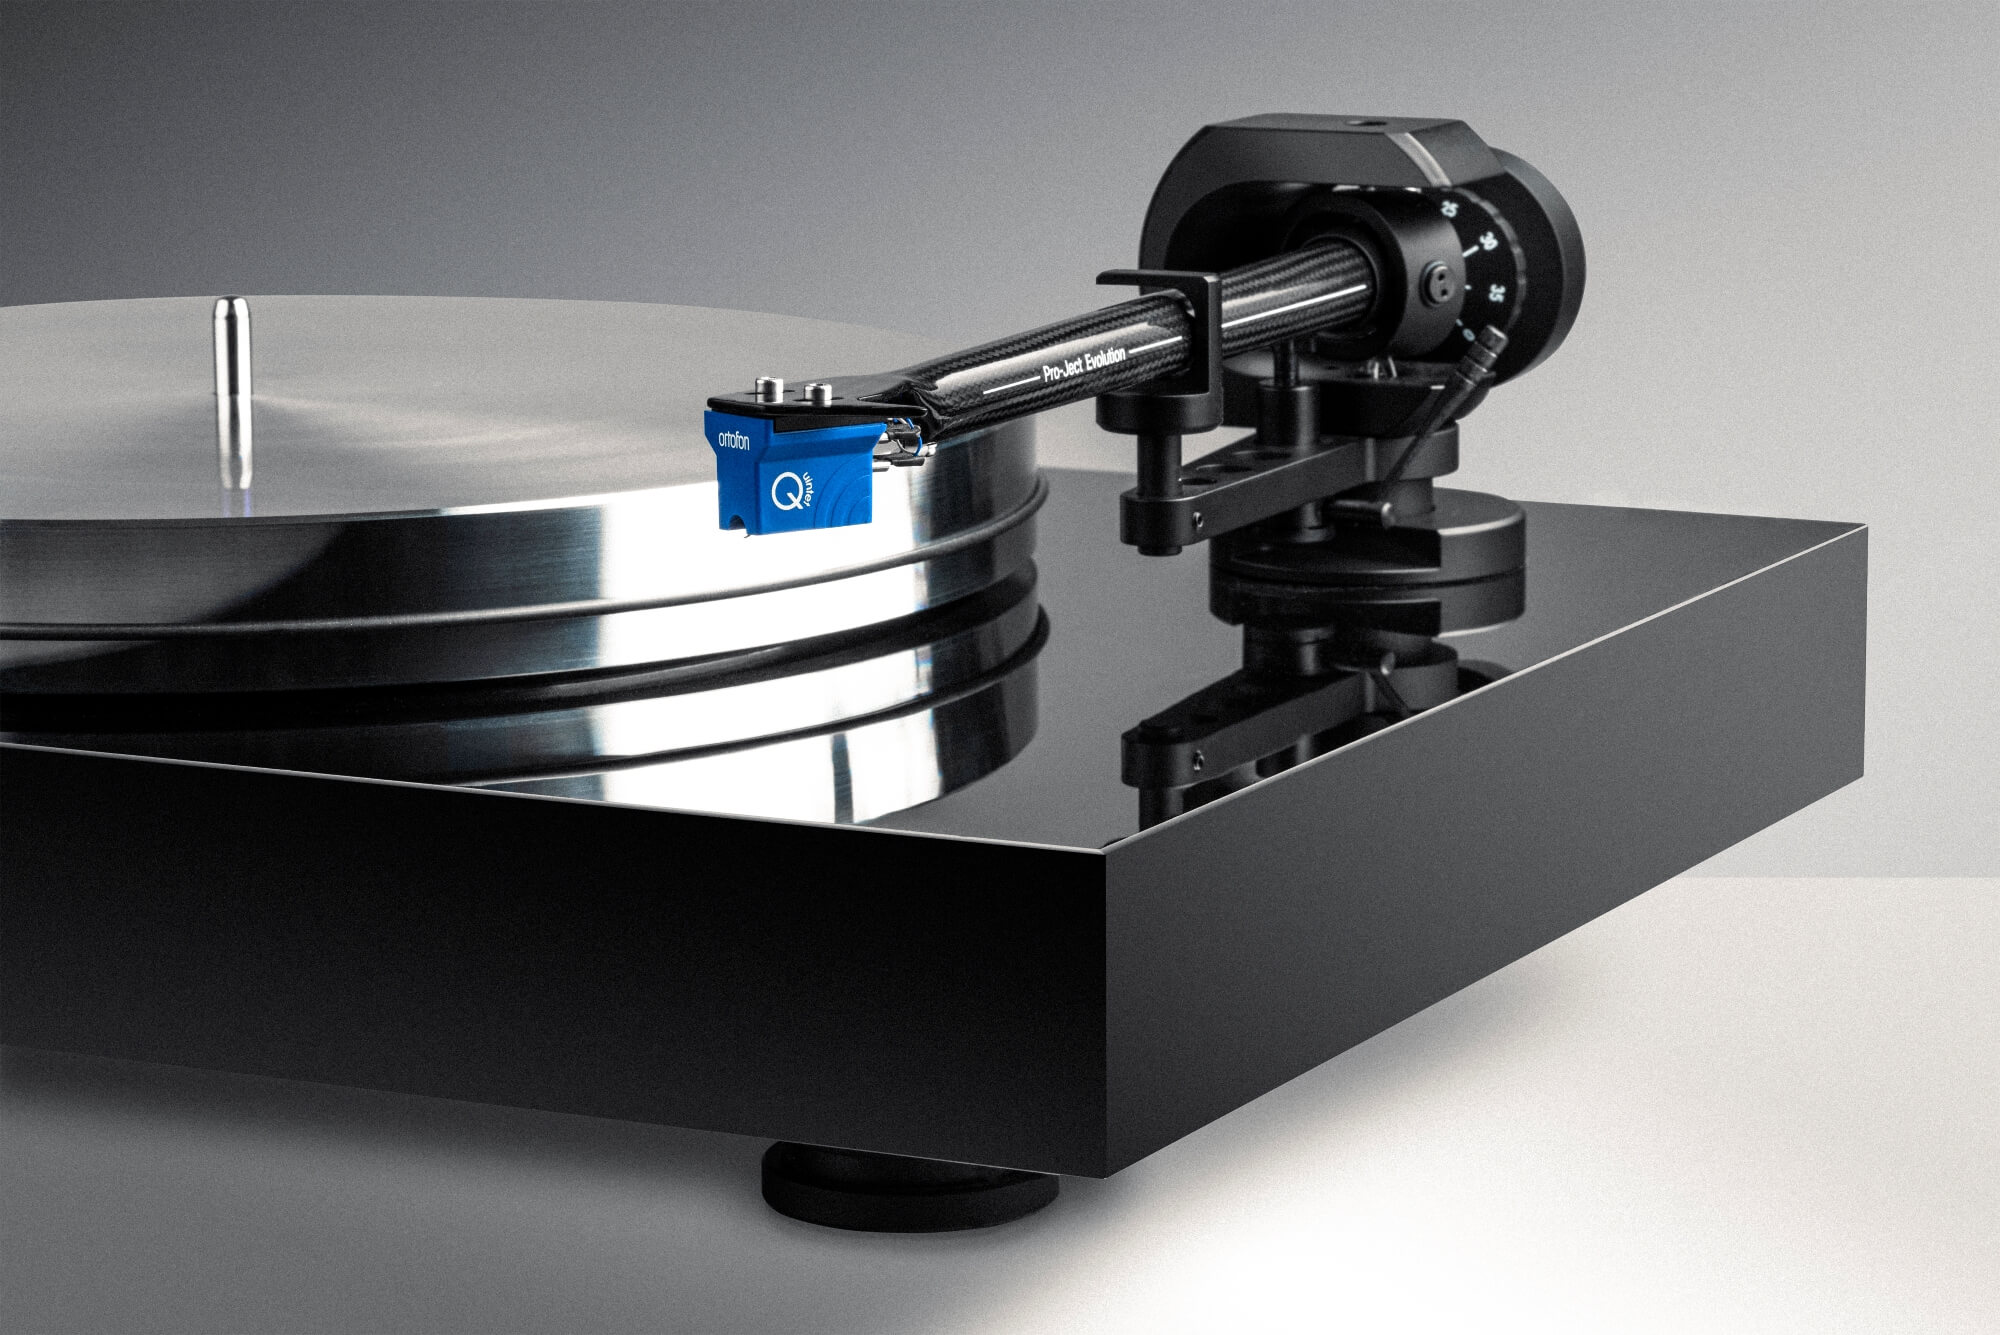
The design of a tonearm is a demanding task. Earlier we said that a key design requirement is that everything be held absolutely rigid and stable. If a tonearm has any flexibility between its pivot point and the stylus then any movements will be superimposed on top of the music signal, causing it to be degraded. In practice this means that the whole assembly should ideally be a homogeneous single piece which is rigid and free from flexing. Yet at the same time this arm needs to have a low-mass in order to work well with most modern pick-up cartridges.
Pro-Ject has met this requirement superbly on most of its turntables by employing aluminium and/or carbon fibre tubes, and almost always are effectively "one piece" tubes. These tonearm designs are always intended to be as free from any flexing as possible, while remaining rigid and light - often with good electrical shielding as well.
In order to help with turntable set-up, we have produced a comprehensive turntable set-up guide. Originally intended as a universal guide for Pro-Ject turntables in 2012, the topics covered in this guide are timeless, but the guide is best used in collaboration with your standard product user manual to add further context and understanding. The only thing that's aged here is some of the product references. Inside this guide you'll find advice on...
If you still have questions after reading our guide, please get in touch with your local hi-fi retailer or Contact Us. Turntables are precision instruments, so proper care and attention should be paid while setting up or making adjustments.

